Tuesday, October 8, 2013
Day 1 Creative Chemistry 102
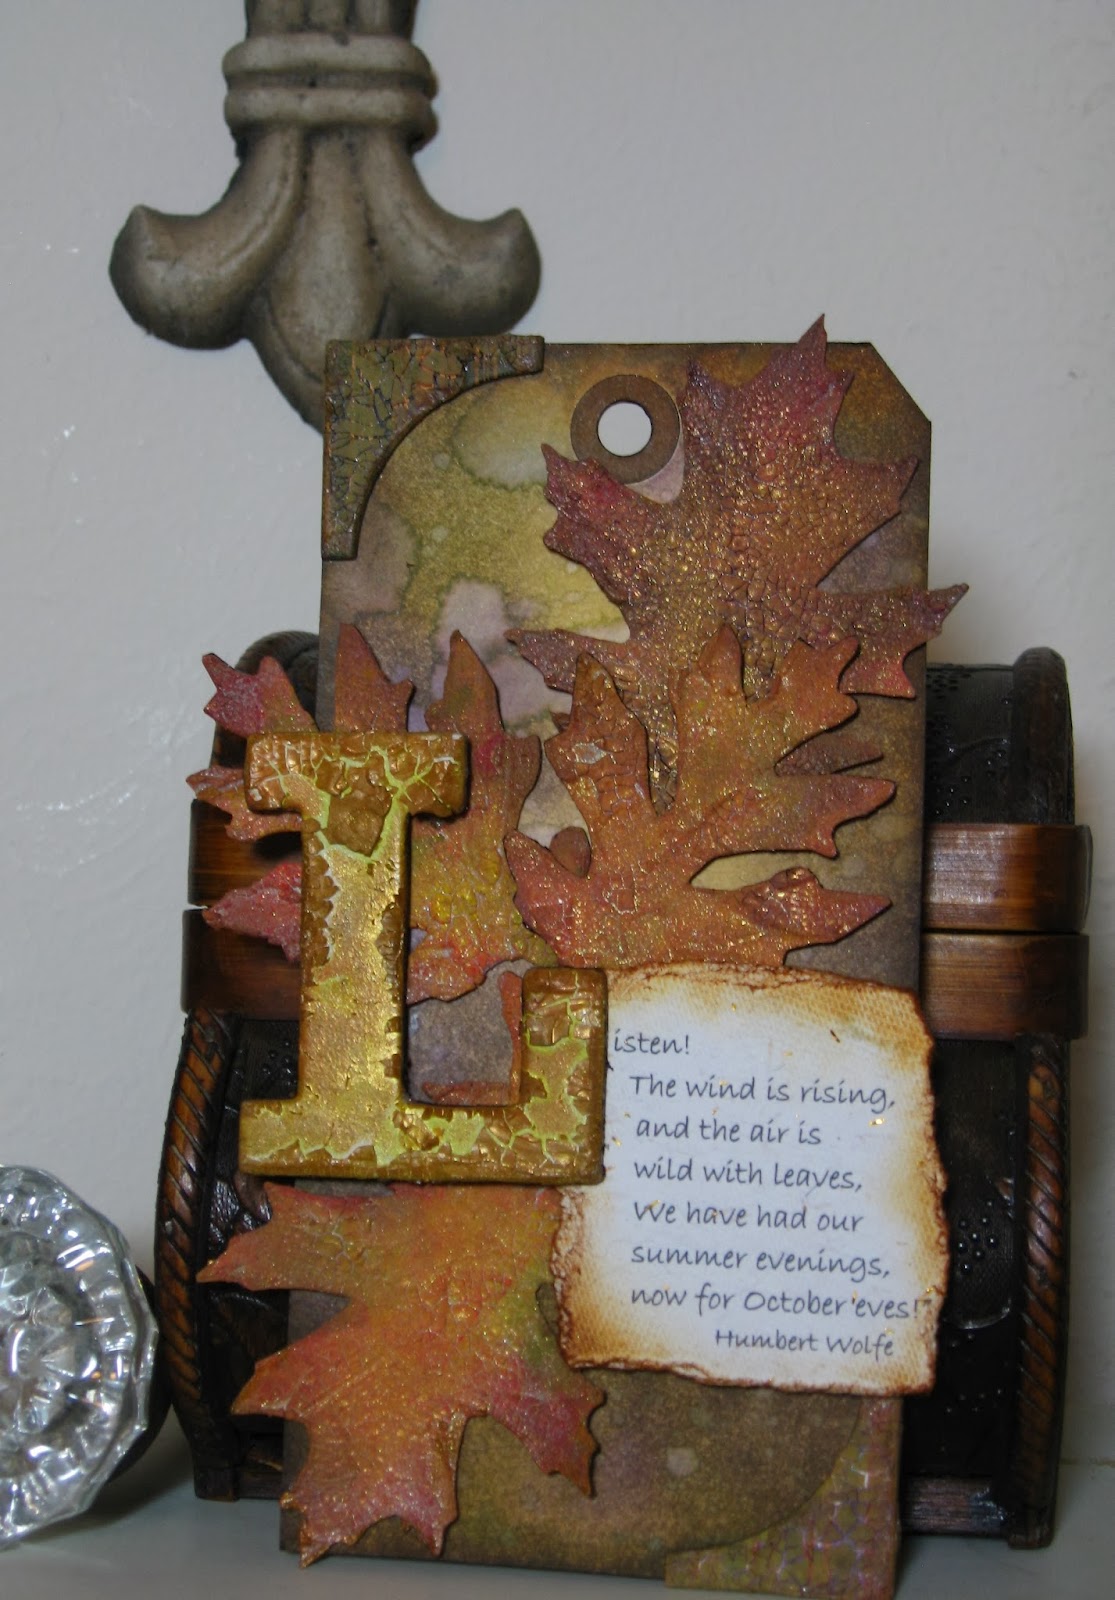
Loving all the great techniques I am learning in class! The tags for class are mainly meant to be a reference point for the technique, but I got carried away with my idea for this one. Love this particular look of Ranger Clear Rock Candy Crackle on die cut leaves. I cut mine from Grunge paper and followed the technique for class. Same technique is used on chipboard "L" and corner chipboard pieces. The saying was one I found online and printed onto a handmade paper that has gold flecks embedded in it. The line that inspired me was "the wind is wild with leaves". I added a spritz of Wonderwash gold over both the chipboard "L" and the leaves. The background tag is actually one I made in CC101 last year and was a "reject". I think it fit nicely with this idea, so was able to use it. That just goes to show that something you made one day and was not your favorite may turn out to be just right for another project. On to day two!!!
Wednesday, October 2, 2013
More Halloween Postcards and a Sparkly Transfer Technique
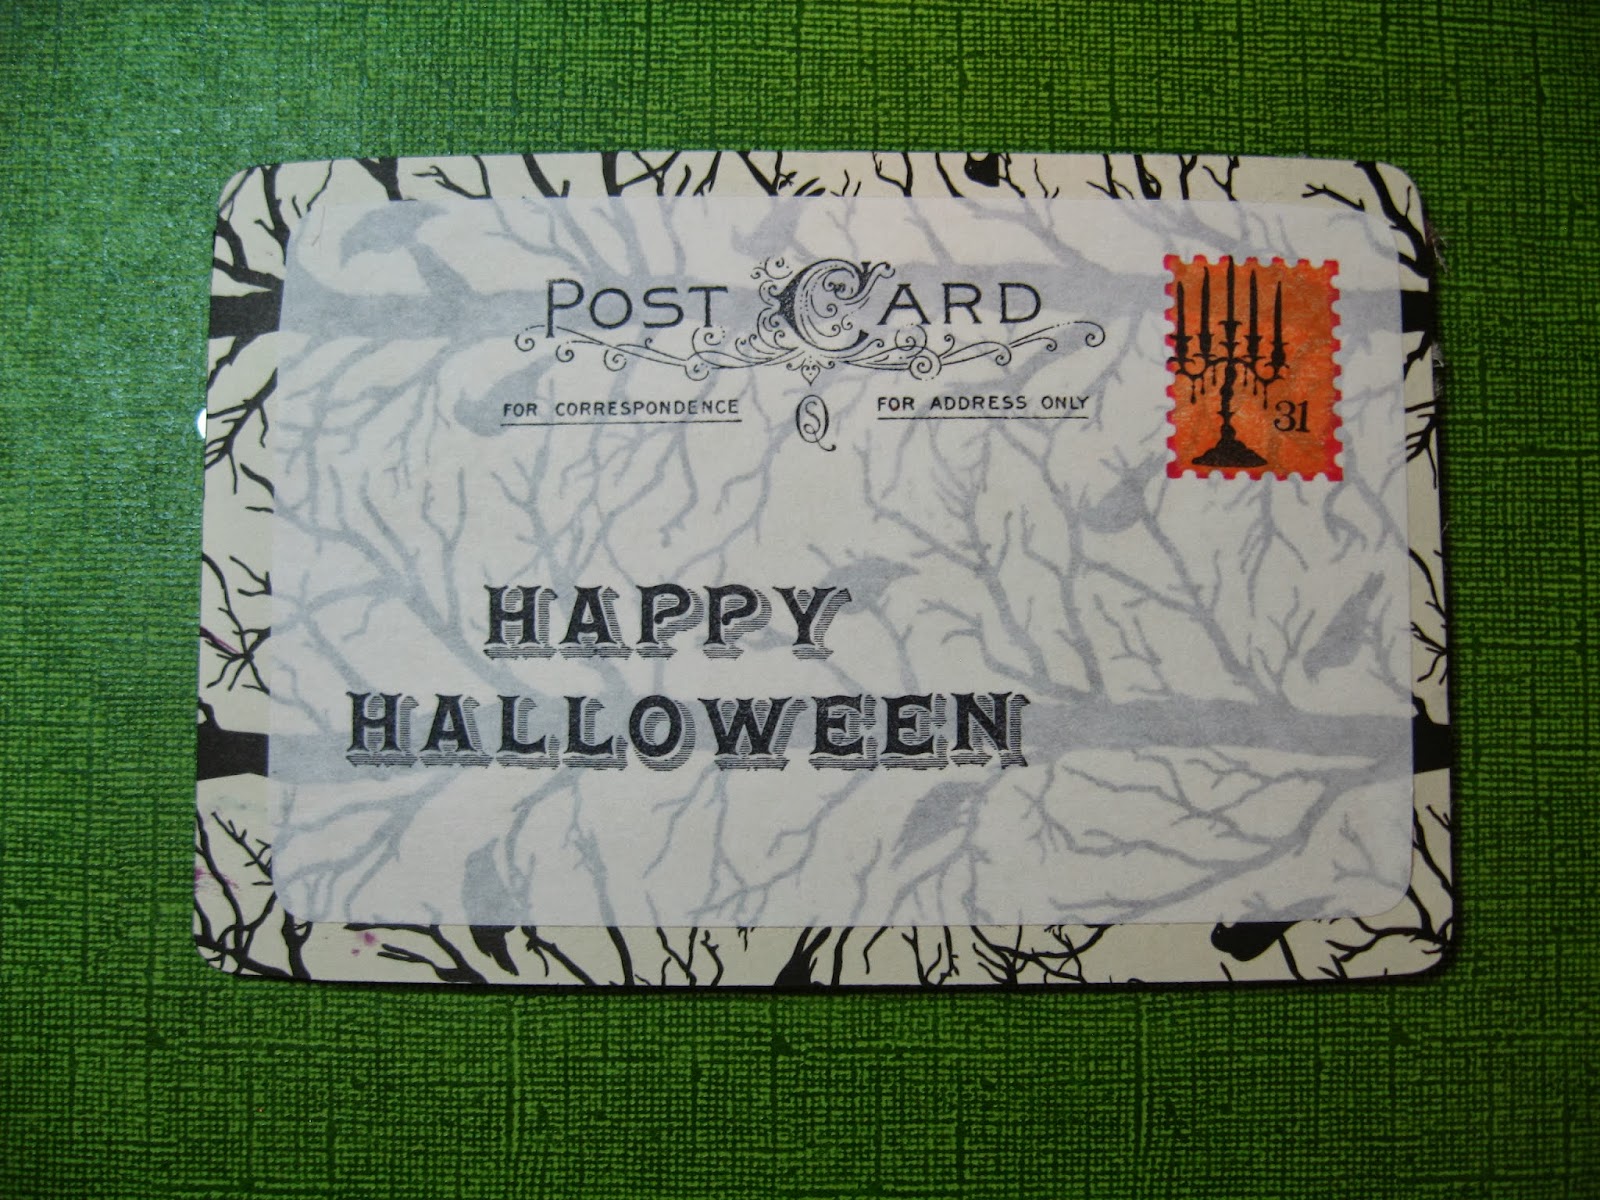
Here are the other two Halloween postcards I did for swap.
This one is done using die-cuts and specialty papers. The crow is a decoration from Martha Stewart's Halloween products. The swirl is a Grunge board die cut that has been painted with Distress Picket Fence paint and then coated with Clear Distress Crackle paint. The tattered roses on the bottom are Tim Holtz Ideaology Trimmings inked with Distress ink.
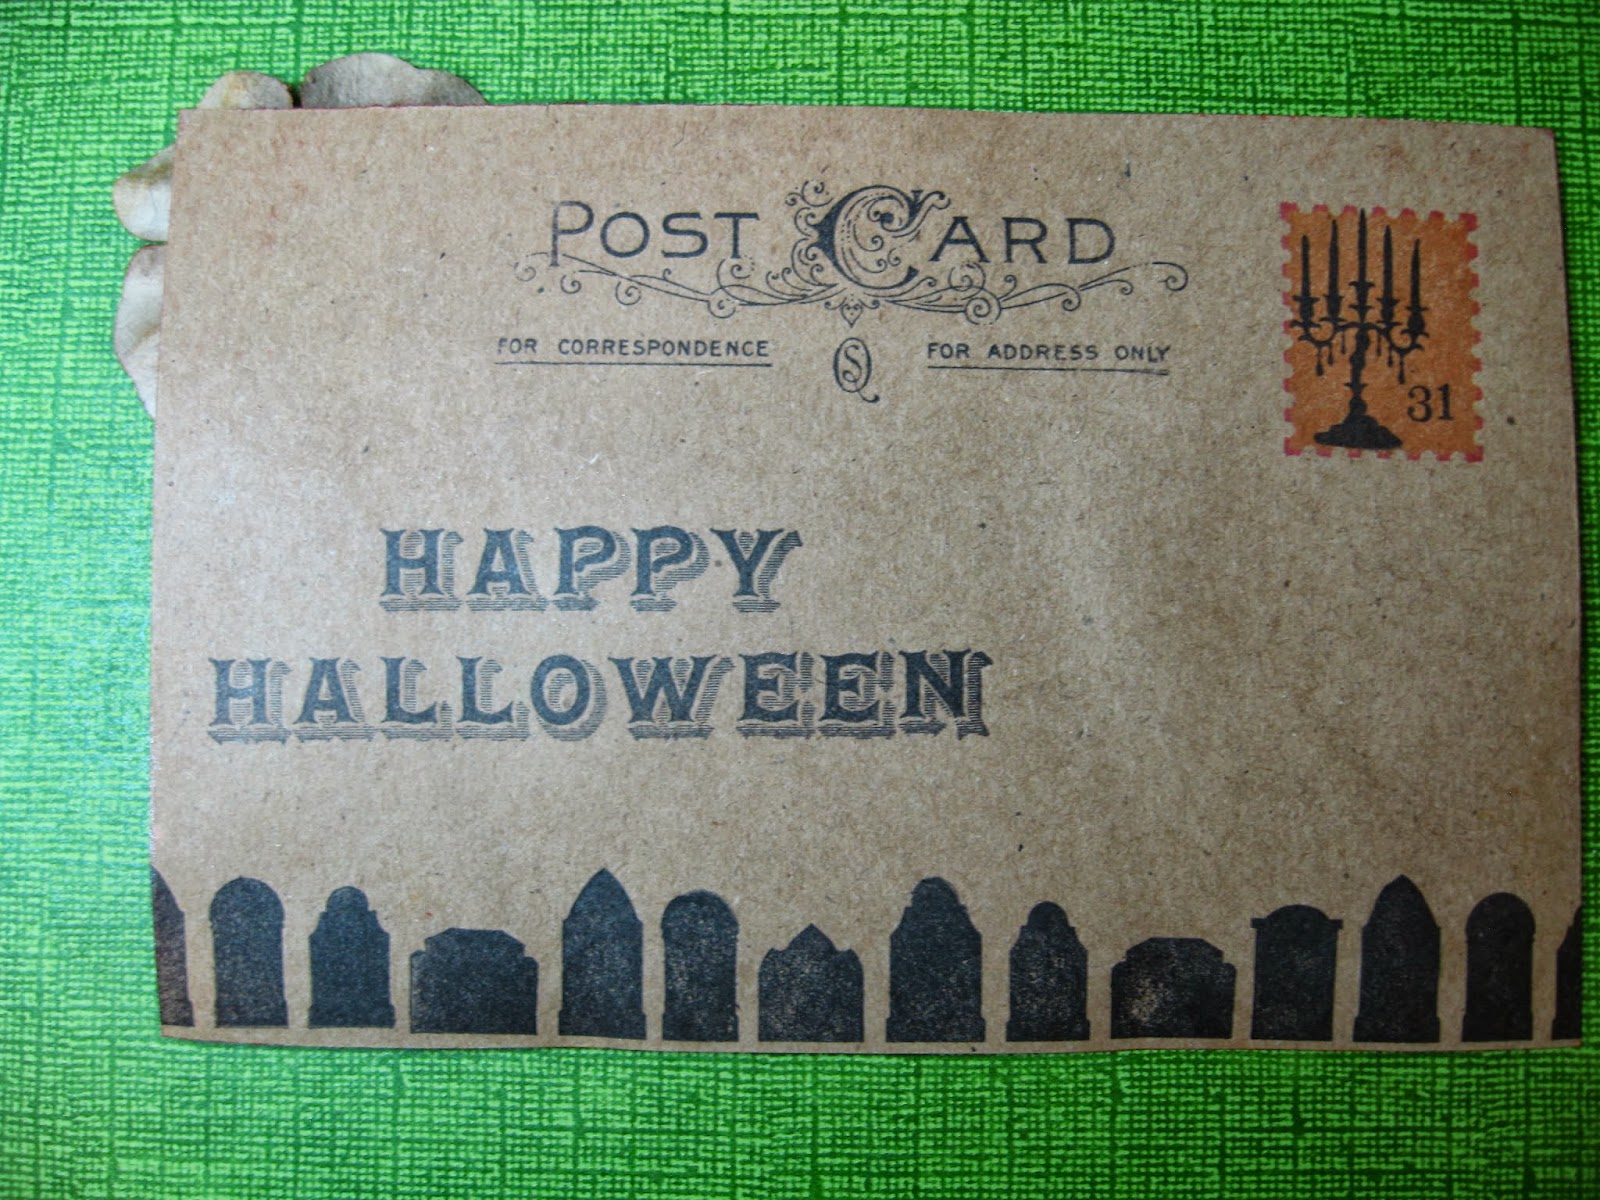
Here is the back of the card:
I stamped the Happy Halloween from Martha Stewart as well as the candelabra. The postage stamp is a shadow stamp from Hero Arts and the "post card" words are the same as used on prior postcard.
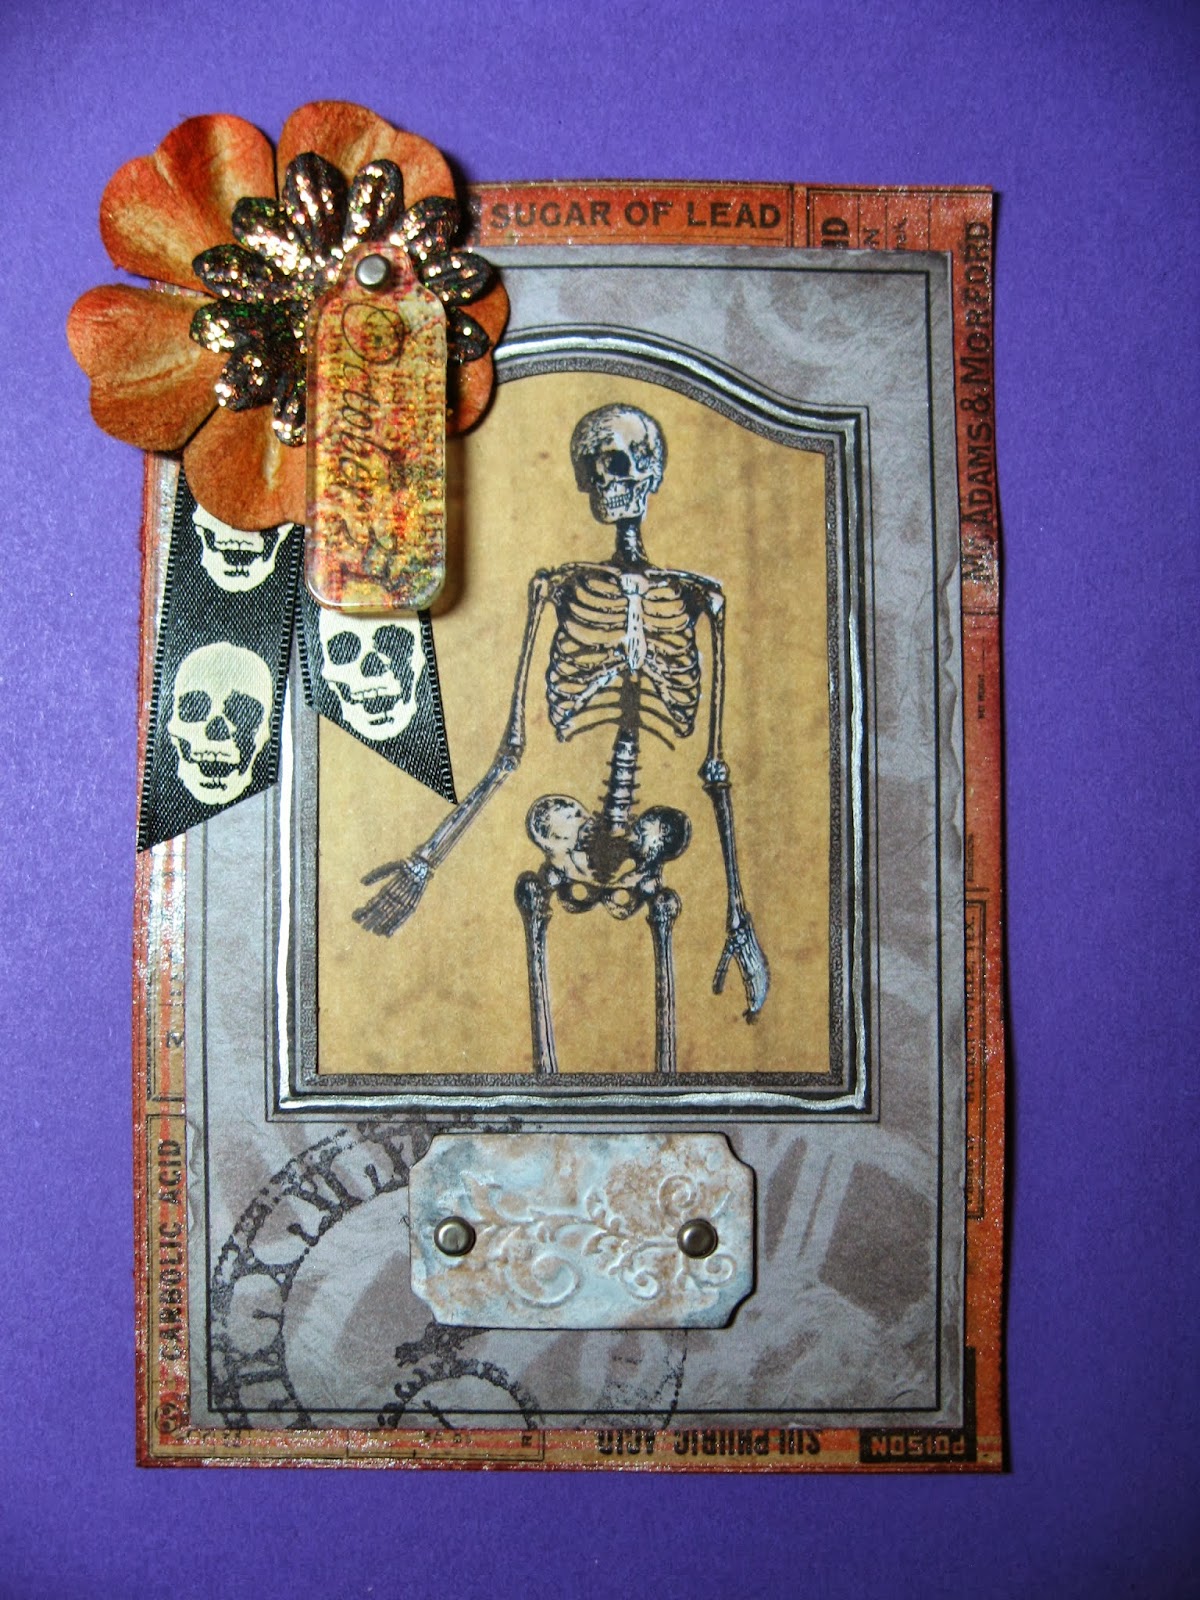
My final one for this swap uses lots of techniques including stenciling over a Graphic 45 die-cut frame from Times Nouveau collection with the new Tim Holtz Clockwork stencil, but I came up with one of my own that is going to be my favorite to use I think for a while:
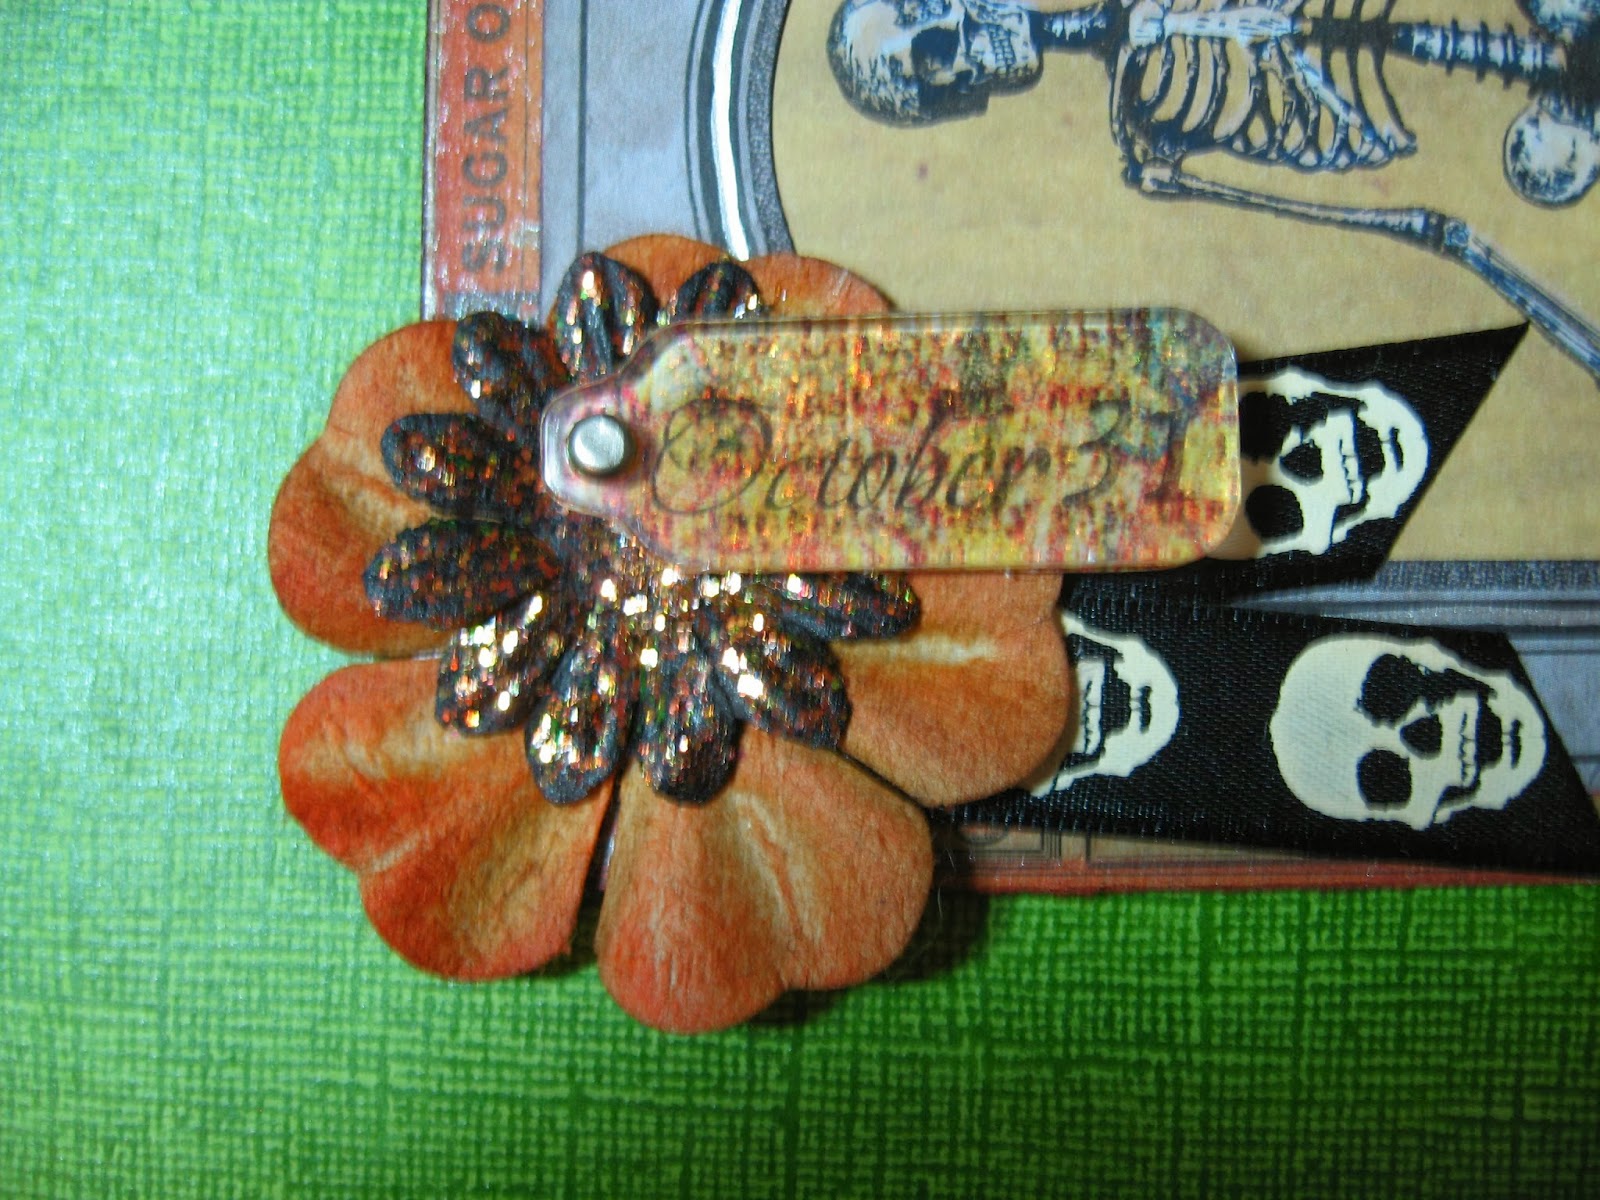
Here is a detail of the decoration in the corner:
I learned some terrific transfer techniques in the Technique Toolbox online class at Big Picture Classes.com from Claudine Hellmuth. It was an excellent class and I highly recommend it if it becomes available again on their website. My transfer technique began based on an idea from that class.
First, I stamped the word "October" and the number 31 onto a pattern scrapbook paper using Ranger Black Archival Ink. I used Glossy Accents to glue down a clear acrylic tag shape from the Idea-ology Fragments line onto the paper. I let this dry. I then used water and my fingers to rub off the paper. This left my stamping and the pattern from the paper on the back of the Fragment. From the front I now had a see-through Fragment that also had a design on it. It looked just fine like that and I could have used that...but, I like things that sparkle.
Years ago, this company Stubby Stampers.com had marvelous events locally where they would show all the latest and greatest products and some terrific new techniques. I am talking before everything was so available everywhere on the internet. They are still in business and have a great online website so check them out. http://www.stubbystampers.com/ They used to show a technique where you stamp your image with permanent ink onto a clear plastic sheet and use glue and glitter on the reverse side to get some gorgeous glittery images that are smooth on the front.
That idea, plus a paperweight my mother made years ago with Mica underneath a transfer image, gave me the idea to try Stickles glitter glue on the reverse side of my Fragment.
To do this, you have to flip the fragment over so the side you had glued down to the paper is facing you. Spread the Stickles evenly over the entire back of the Fragment. I used Stickles "Icicle". You have to let it dry totally which takes a while (no using heat gun for this.)
Meanwhile, I also coated a black paper flower with the same color Stickles. The larger flower is a kraft color one that I inked with Distress.
Once your Fragment is totally dry, flip it over and admire the sparkles. I tried several different colors of Stickles and find that the lightest colors work best for this. I would stick with Crystal or Icicle if you are going to try it. Sadly, glitter does not photograph very well, but it really looks pretty in person.
Here is the back of my Skeleton postcard:
Give the Sparkly Transfer Technique a try and let me know if you like it! I will be posting some more Halloween items as I have some ATC swaps I have joined as well. Thanks for looking!
This one is done using die-cuts and specialty papers. The crow is a decoration from Martha Stewart's Halloween products. The swirl is a Grunge board die cut that has been painted with Distress Picket Fence paint and then coated with Clear Distress Crackle paint. The tattered roses on the bottom are Tim Holtz Ideaology Trimmings inked with Distress ink.
Here is the back of the card:
I stamped the Happy Halloween from Martha Stewart as well as the candelabra. The postage stamp is a shadow stamp from Hero Arts and the "post card" words are the same as used on prior postcard.
My final one for this swap uses lots of techniques including stenciling over a Graphic 45 die-cut frame from Times Nouveau collection with the new Tim Holtz Clockwork stencil, but I came up with one of my own that is going to be my favorite to use I think for a while:
Here is a detail of the decoration in the corner:
I learned some terrific transfer techniques in the Technique Toolbox online class at Big Picture Classes.com from Claudine Hellmuth. It was an excellent class and I highly recommend it if it becomes available again on their website. My transfer technique began based on an idea from that class.
First, I stamped the word "October" and the number 31 onto a pattern scrapbook paper using Ranger Black Archival Ink. I used Glossy Accents to glue down a clear acrylic tag shape from the Idea-ology Fragments line onto the paper. I let this dry. I then used water and my fingers to rub off the paper. This left my stamping and the pattern from the paper on the back of the Fragment. From the front I now had a see-through Fragment that also had a design on it. It looked just fine like that and I could have used that...but, I like things that sparkle.
Years ago, this company Stubby Stampers.com had marvelous events locally where they would show all the latest and greatest products and some terrific new techniques. I am talking before everything was so available everywhere on the internet. They are still in business and have a great online website so check them out. http://www.stubbystampers.com/ They used to show a technique where you stamp your image with permanent ink onto a clear plastic sheet and use glue and glitter on the reverse side to get some gorgeous glittery images that are smooth on the front.
That idea, plus a paperweight my mother made years ago with Mica underneath a transfer image, gave me the idea to try Stickles glitter glue on the reverse side of my Fragment.
To do this, you have to flip the fragment over so the side you had glued down to the paper is facing you. Spread the Stickles evenly over the entire back of the Fragment. I used Stickles "Icicle". You have to let it dry totally which takes a while (no using heat gun for this.)
Meanwhile, I also coated a black paper flower with the same color Stickles. The larger flower is a kraft color one that I inked with Distress.
Once your Fragment is totally dry, flip it over and admire the sparkles. I tried several different colors of Stickles and find that the lightest colors work best for this. I would stick with Crystal or Icicle if you are going to try it. Sadly, glitter does not photograph very well, but it really looks pretty in person.
Here is the back of my Skeleton postcard:
Give the Sparkly Transfer Technique a try and let me know if you like it! I will be posting some more Halloween items as I have some ATC swaps I have joined as well. Thanks for looking!
Wednesday, September 25, 2013
All Things Tim Yahoo Group Halloween Postcard Swap
This is the first of 3 postcards I made for the ATT Yahoo Group Halloween Postcard Swap. I will be posting the others on the 26th and 27th. This is a card I actually started during the class I took online about collage techniques (taught by Claudine Hellmuth).
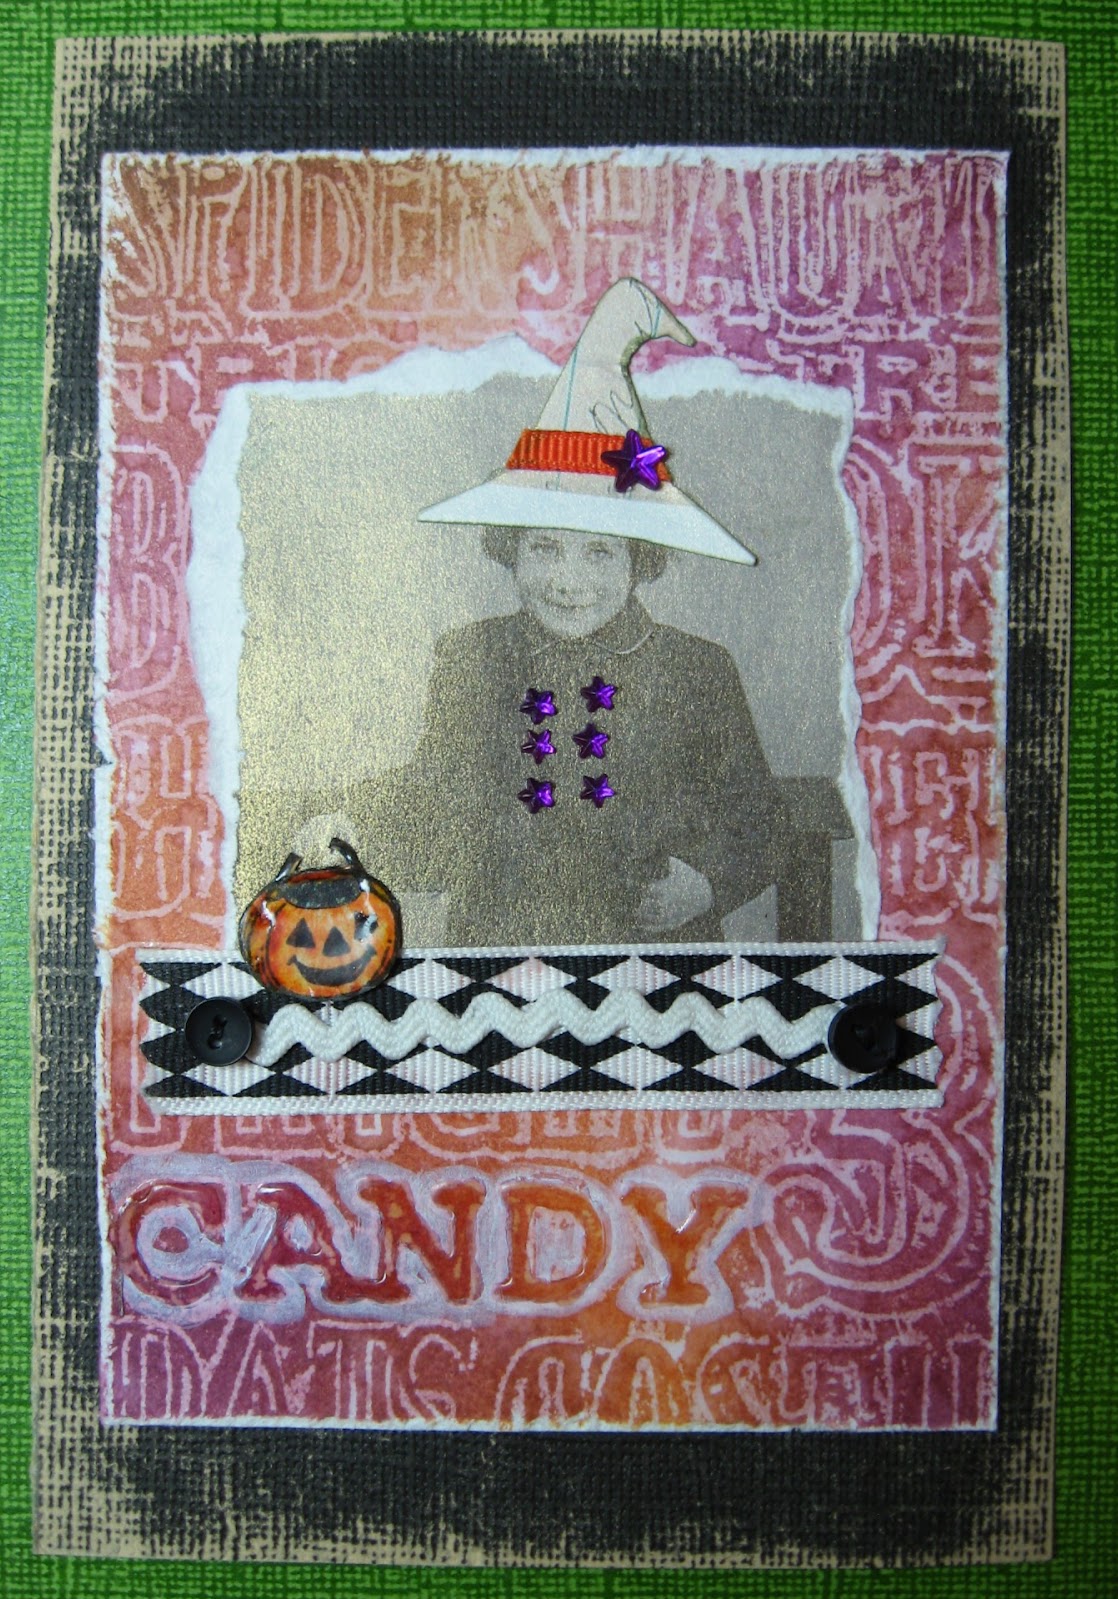
Techniques to make this postcard include - The little girl is a digital image printed on an iridescent specialty paper which was torn to make interesting edge. Hat is cut from a paper with ribbon trim and rhinestone star. Her buttons are also rhinestone stars. Pumpkin is stamped out on cardstock, trimmed, colored, and then covered with Ranger Glossy Accents. Trim underneath girl is ribbon, topped with glow-in-the-dark rick rack, sewn down with two black mini-buttons. The word "candy" on background made with Tim Holtz Sizzix embossing folder and my wax paper resist technique is highlighted with Ranger Glossy Accents and then further highlighted by going around the letters using Picket Fence Distress Marker.
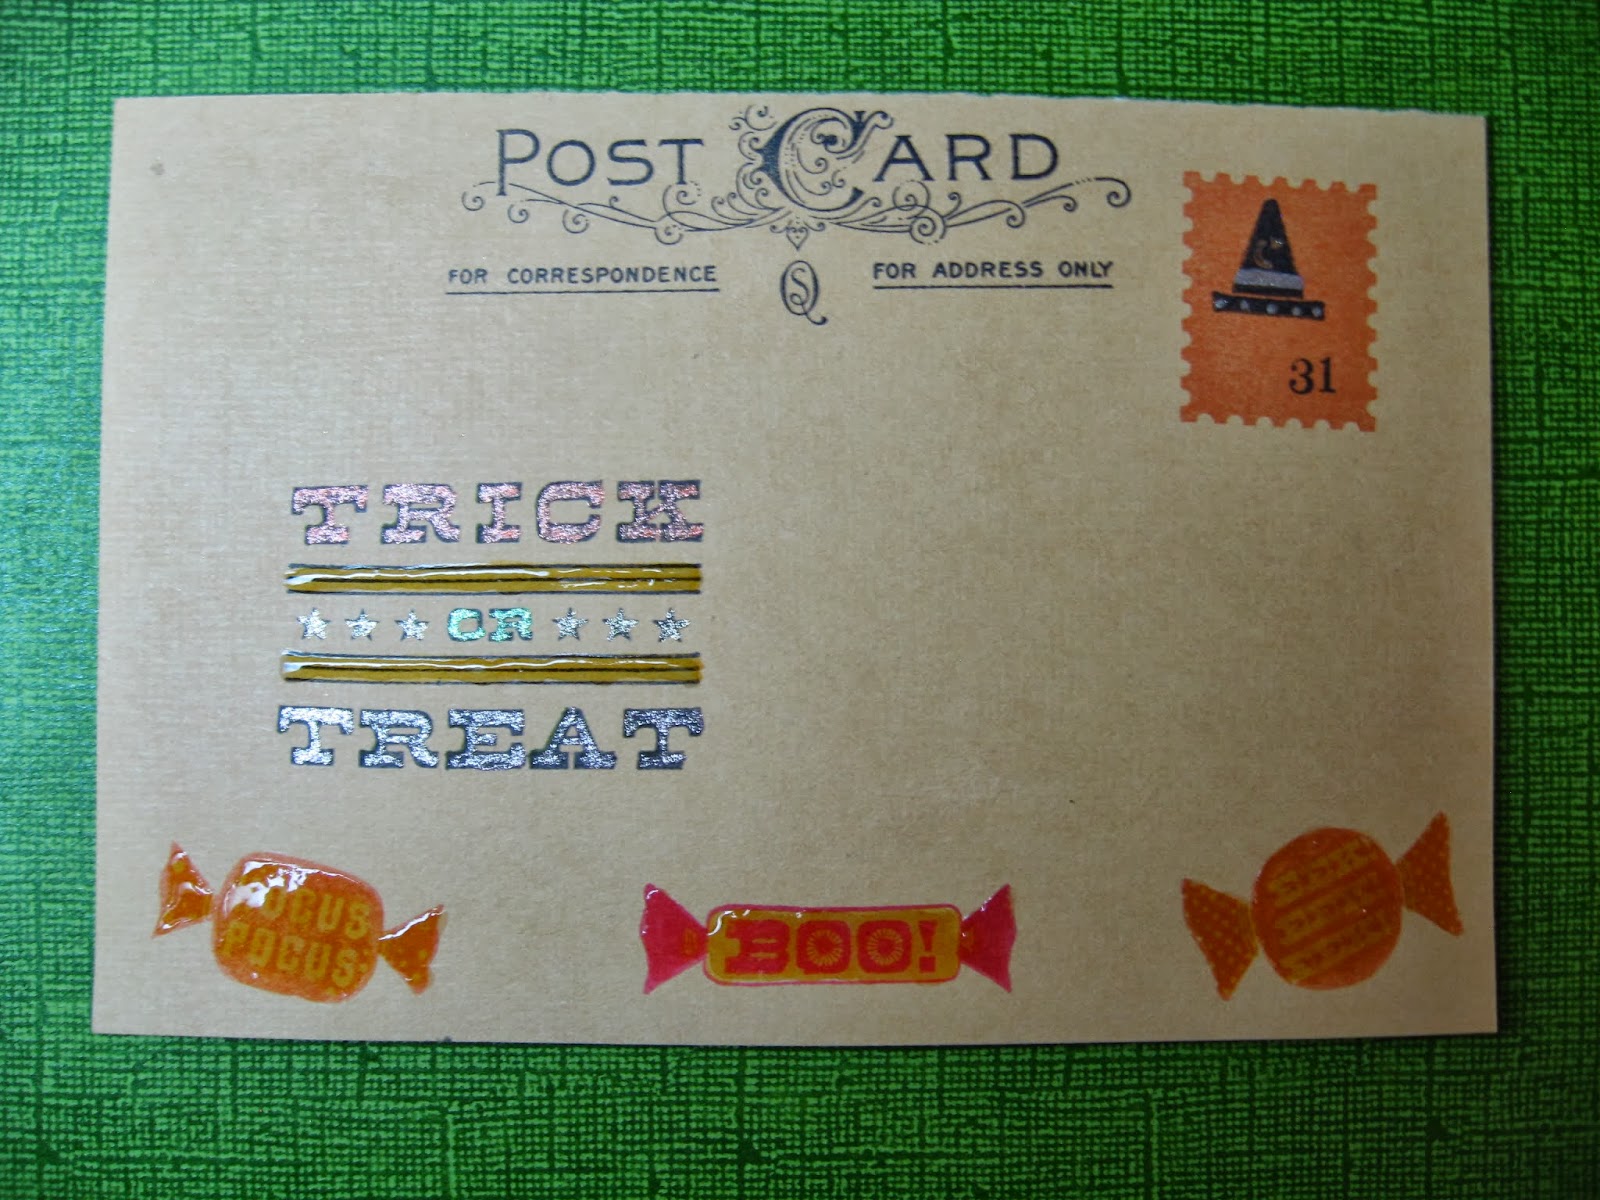
The back is made to look like a postcard using "Postcard" stamp from Tim Holtz Stampers Anonymous The Journey collection. Candies are stamps from Martha Stewart Halloween collection and are covered in Ranger Glossy Accents. The fake stamp is a Hero Arts Shadow stamp which I then stamped a little witch's hat from Studio G ($1 set) and some numbers. The "Trick or Treat" is also from a Martha Stewart set and I highlighted it with Ranger Glossy Accents as well as some Sakura Gelly Roll glitter pens. Here is a closeup of that...
Hope you enjoyed looking and come back to see my other two postcards in the next few day. Thanks.
Thursday, September 5, 2013
June Tag and Indian Summer
This is a tag I did for All Things Tim August Indian Summer Challenge. It is also going to stand as my June tag for the 12 tags of 2013 as it uses some of the same techniques as the June tag on Tim Holtz's blog. I stamped the tree image and colored in a water-color technique with Distress Markers. It is mounted on a piece of Coredinations cardstock cut and embossed with a Spellbinders die. The tag itself is actually a background paper I made using Gelli plate technique with acrylic paints. I cut the paper and glued it to a regular manila tag to make it the right thickness. It is hard to see it is overstamped with an Inkadinkado background stamp. The challenge for the month was to make an item using red, orange, yellow, and black. You also can't really see that some of the acrylic paint I used is a metallic red, so the background does actually have a shimmer. I am trying to catch up to this month's techniques for the tags of 2013 and also have some ATC swaps I joined that I will be doing, so will be posting again soon. Life just seems to get in my way alot for stamping and creating time.
Monday, August 12, 2013
Claudine Hellmuth's online Technique Toolbox class
I haven't been able to do much creating lately, but have fortunately been able to follow along with Claudine Hellmuth's online class, Technique Toolbox. Well worth the money, she provides a cute little recipe box to make along with all the techniques for each week in easy to print recipe card format. The purpose of the class is not necessarily to have a finished project each day, but to give each technique a try and have that idea handy for the future when inspired to make something. Guest artists provide some gorgeous examples using the featured technique, and Claudine Hellmuth does a instructional video for each day. Also, the class is through Bigpictureclasses.com which allows the student access to log in long after class is over to refresh your memory on what was taught. The classes were 1 daily for five weeks! Can't beat the price and all the great ideas that will spark future creativity.
Monday, May 27, 2013
12 Tags of 2013 - May
I am still playing along with the 12 Tags of 2013 on Tim Holtz's wonderful blog. This month, he is featuring a technique using Idea-ology Remnant Rubs. I didn't have any of those on hand, but did have a stack of alphabet rub-ons from DCWV gathering dust in my stash of crafting things, so I decided to try those to see if it gives a similar effect. I started off by applying some letters randomly around a tag, and also added some lines of periods so they just look like random dots. I used Distress Stains in the same technique per the blog and was happy to see it did give a similar effect of resisting the stains.
I did not have the enamel tags from Idea-ology either, so used white Architexture Stone piece from EK Success. After I applied a white rub-on letter to it, I stained around the letter with Ranger Alcohol Inks.
Another techique I tried which was not on the blog, was to apply Alcohol Ink and then Clear Distress Crackle to the back of the Idea-ology Film Strip Ribbon. I wanted to add more red/purple to that side of the tag as it was mostly yellow and orange on that side. Instead of trying to add it to the tag itself with more stain, I added color via the layer on top (the plastic ribbon). You have to be careful to apply the Crackle only down the middle of the plastic ribbon and leave the edges clean so you can then use double-stick tape to attach it as per the blog. Also, I cut it slightly larger than I needed so I could have clean ends with which to hold it down flat with weight on each end until it totally dried. I then trimmed that part off before adhering it to tag. I feel the crackle gives the film strip ribbon an interesting layer of texture, while it remains smooth to the touch on top.
Once I had stamped a portion of my Inkadinkado Illuminata stamp, I wanted to highlight the center image of the hands to make them more important than the rest of the image, so used Distress Markers in Picket Fence (white). For anyone who may not catch it, the hands are from the portion of Michelangelo's Sistine Chapel painting called The Creation of Adam, depicting God reaching out to give Adam the spark of life. I had also stamped a honeycomb image from BoBunny Geometric Patterns stamp set around the edges and highlighted portions of that with the Picket Fence marker.
I applied the saying "possibility begins with imagination" from the Idea-ology Metal Decorative Bands pack with some brads I had on hand and then added a selection of decorative fibers.
I do like how it turned out and will definitely be using this technique again. After I had finished this, I found out that my local Michaels crafting store now carries the Tim Holtz Idea-ology Word Remnant Rubs, so I got a pack of those to use on other tags, ATCs, and cards. Can't wait to do that same technique again.
Monday, May 20, 2013
Taking Print Candy printing/mixed media class online
I had been hearing about Gelli plates everywhere and saw this artist offering online class. http://www.arteyecandy.com Have started the class and really love it. For first class, we made our own print block with lino cutting. I haven't done that since highschool, but really enjoyed it.
I printed out an image I liked (having flipped it via printing software). I then traced a rough outline onto the Speedy-Cut material. You can use carbon paper or just rub a soft-lead pencil across the back of image to be able to do the transfer.
I had a Speedball Lino Cutter and carefully cut out the image.
Once I inked it to test it out to be sure I liked it,
it looked like this...
I then used it
to make this tag...
It was fun to try this out. However, I own lots and lots of stamps that I have purchased through the years, so don't really see myself getting into lino cutting. That being said, it is always good to know you can make your own custom image if you don't have an appropriate image on hand.
The next class involves monoprinting with Gelli Plate from Gelli Arts. I did not have a Gelli plate, so made a gelatin plate via directions from this excellent printing artist...
http://printmakingwithoutapress.blogspot.com/p/gelatin-printing-tips.html
I have already tried it and liked it so much, that I went ahead and bought a Gelli plate from my local scrapbooking store. The advantage of the Gelli plate is that it does not have to be stored in fridge and will last much longer than a gelatin one. I will be posting what I made with the gelatin and the Gelli plate for my next post.
I printed out an image I liked (having flipped it via printing software). I then traced a rough outline onto the Speedy-Cut material. You can use carbon paper or just rub a soft-lead pencil across the back of image to be able to do the transfer.
I had a Speedball Lino Cutter and carefully cut out the image.
Once I inked it to test it out to be sure I liked it,
it looked like this...
I then used it
to make this tag...
It was fun to try this out. However, I own lots and lots of stamps that I have purchased through the years, so don't really see myself getting into lino cutting. That being said, it is always good to know you can make your own custom image if you don't have an appropriate image on hand.
The next class involves monoprinting with Gelli Plate from Gelli Arts. I did not have a Gelli plate, so made a gelatin plate via directions from this excellent printing artist...
http://printmakingwithoutapress.blogspot.com/p/gelatin-printing-tips.html
I have already tried it and liked it so much, that I went ahead and bought a Gelli plate from my local scrapbooking store. The advantage of the Gelli plate is that it does not have to be stored in fridge and will last much longer than a gelatin one. I will be posting what I made with the gelatin and the Gelli plate for my next post.
Subscribe to:
Posts (Atom)