Sunday, January 24, 2016

Jambalaya's Stubby Stampers Birthday Club card

If you're a stamper and haven't seen the lovely stamps at Jambalaya's Stubby Stampers website, you definitely should give them a look.

A card exchange was started on their Yahoo group, so members could sign up to make birthday cards for each other throughout the year.

This is the first card I made to send out.


I made it using two coordinating preprinted papers. This design element stamp #3354 stamped out three times on preprinted paper in two shades of Colorbox Fluid Chalk ink was cut into three layers. I then applied Ranger Stardust Stickles to each layer, before applying popdots between layers to give it a dimensional look. The final topper is a pearl brad.


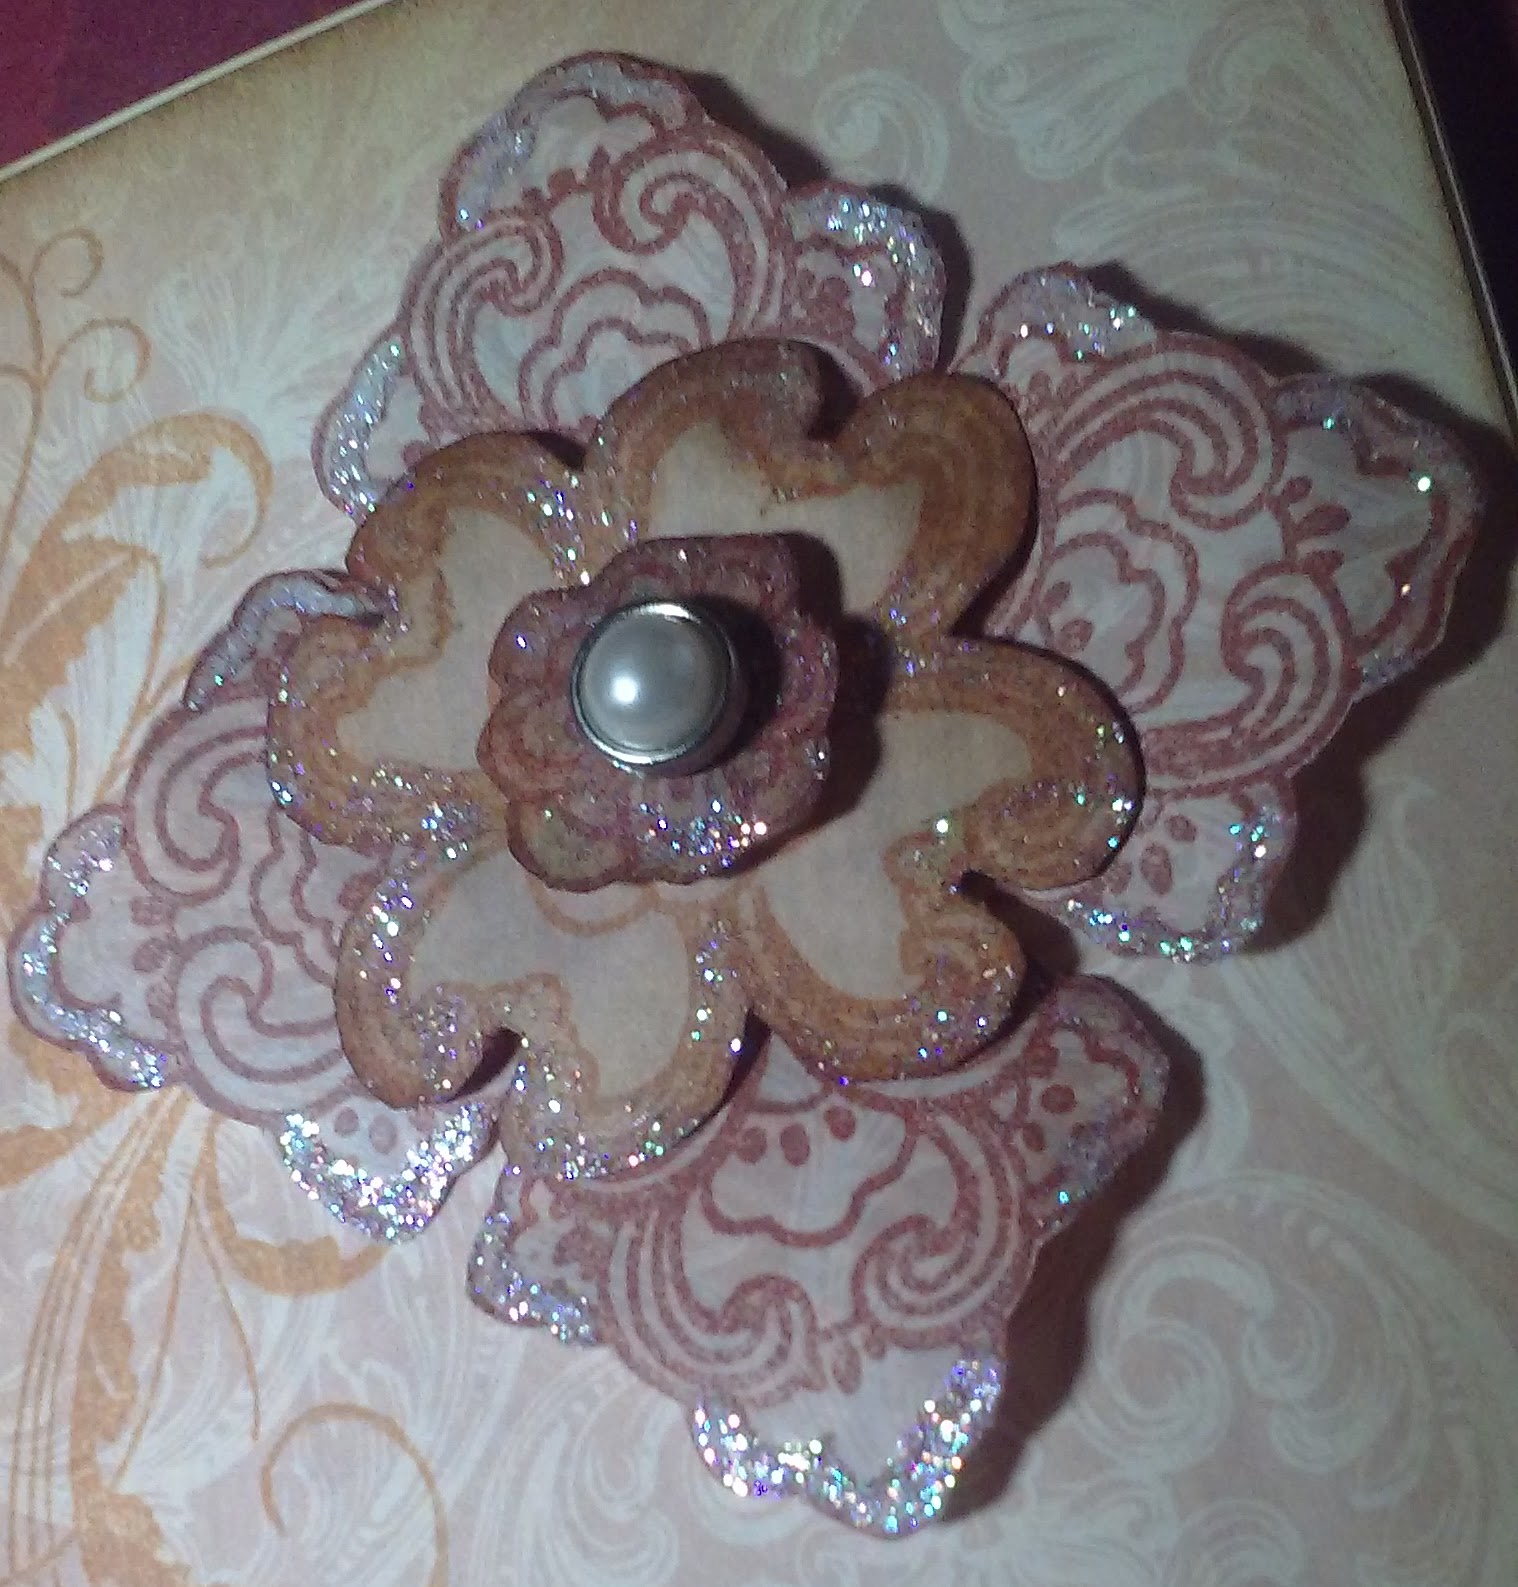
When I adheared it to the paper, I did place small popdots under each "leaf" of that layer to keep it raised. I also curled the paper slightly over a brush handle so it would stay raised up from the background paper, giving it more dimension.

A second design element stamp #4039 was stamped in Yellow Ochre Colorbox Fluid Chalk ink on the pre-printed background.

I cut a strip of coordinating paper for the border and also added some pearl cobachons over a row of what is actually a line of green dots on the paper. I didn't really like the green, and it gave me a guideline for the spacing of the pearls with zero measuring on my part! Gotta love that.

 Hope the recipient enjoyed getting it as much as I enjoyed making it!


A quick box decoration

For Christmas, my step-mother's church had small boxes to fill to be given away as a thoughtful gesture to workers in the community. The church supplied the boxes, which were supposed to be decorated, filled, and returned to be distributed.

I did a diecut in a pearlized paper, topped it with an oval diecut to which I had adheared some silver metal-looking stickers that are on a vellum paper. In the picture, the vellum appears white, but IRL it was really see-thru once mounted to the paper. I used a metal sticker for the silver lines on either side of the center which extends around the corners of the box. At each end of the metal sticker, I used a silver plastic self-stick cobachon.


The back looked like this:


And each side had the same silver Christmas tree sticker applied:


Thought it was a pretty and quick way to add something to an otherwise plain, red box.

A fun project and worthwhile one that hopefully made some people smile at Christmas time.

Sunday, January 10, 2016

January - 12 Tags of 2016

CHA is currently going on in Anaheim, CA. I've been watching lots of Periscope live broadcasts from the showroom floor and checking out the Facebook and Twitter pages of companies with brands that I like. All the creativity in the videos and excitement about new products actually prompted me to create something! Here's my January tag using the techniques from timholtz.com 12 Tags of 2016.


I do the two techniques just a little differently than as shown on timholtz.com

For the metal look technique, I use metal tape from the hardware store. If you notice, I embossed with two different folders. One is a gear pattern and the other, Eiffel Tower, is from Sizzix Alterations Texture Fades. I used just the portion of that folder with the postal cancellation.

After embossing, I apply Denim and Mushroom alcohol inks to the embossed metal tape. It makes a subtle difference and here's a photo of how it looks with just the alcohol inks applied.


The tag on the left has the alcohol inks, while the tag on the right is just the embossed metal tape. Once you then apply the final step of Black Soot Distress paint, you can still see the other colors. I find it looks even more like real aged metal with those two other colors showing through.


For the chalk look, I don't have the same materials available. I used Tsukineko Moonlight White Brilliance ink and actual chalk. Once I stamped the clock image from Hampton Art, in the Brilliance ink, using a paint brush I dusted white chalk powder over it. I then also dusted a little purple chalk powder as well. I used a piece of fleece fabric to burnish the chalk into the ink and wipe away the excess.


I glued down my embellishments with Ranger Glossy Accents. I also used idea-ology Deco sheet in silver to cover the middle section of the manila tag.


I noticed when looking at my blog posts from last year, they stop abruptly at March 2015. Here are the two little reasons I didn't have any time for stamping:


I found these little guys back in April 2015 abandoned by a feral cat a friend of mine was feeding. Fortunately, I had experience raising kittens and now these little guys aren't so little and look like this:


Thanks for checking out my stamping blog.